Hi all,
Windows SharePoint Services (WSS) 3.0 give lot of many useful built-in field types and end users can utilize these fields for collecting/disseminating business data in different out-of-the-box list types. At times, the business needs more complex scenarios and customers ask for some field types such as Social Security Number and its validation, US addresses, employee status etc which SharePoint does not provides. In this walk-through, I will demonstrate how we can develop these complex field types, validation, and field type properties as well.I strongly recommend to read Ted Pattison's article on developing custom field types for SharePoint 2007.
What Exactly Is a WSS Field Type?
When users want to create a new column and add it to a list or document library, they must select an underlying field type on which to base this new column. Likewise, a user or developer must also select an underlying field type when creating a new site column. Field types have their name and description. SharePoint 2007 provides several out-of-the-box field types such as:
>> Single line of text
>> Multiple lines of text
>> Date and Time
>> Choice (menu to choose from)
>> Number (1, 1.0, 100)
>> Currency ($, ¥, €)
For developing custom field types 4 things:
- An ASP.NET user control that defines an editing surface known as a RenderingTemplate
- A public class to initialize and manage the RenderingTemplate
- A public class that defines the actual custom field type
- An XML file that is used to deploy the custom field type
I will split into 3 parts for defining 3 new field types:
a) Social Security Number field type (data validation)
b) United States Address (Multicolumn values)
c) Employee Status (Custom Property Fields)
Step1: Social Security Number field type (data validation)
Create a new WSPBuilder project and name the project "OfficeSpaceFieldTypes".

Step2: Right click on "OfficeSpaceFieldTypes" project >> Add >> New Item >> Choose WSPBuilder as the category >> Choose "Feature with receiver" and name it "OfficeSpaceFieldTypes"

Under FeatureCode "OfficeSpaceFieldTypes.cs", remove all the exceptions
(throw new Exception("The method or operation is not implemented.");)
Step3: Create a VSeWSS 1.2 project.
We can create a new field control using VSeWSS for Visual Studio 2008 as we can very easily develop field controls and copy over to our WSPBuilder project.
Open up Visual Studio >> File >> New >> Project >> From "Project Types" select "SharePoint" and from "Templates" select "Empty". Project name: CustomFieldUsingVSeWSS
Right click on the project >> Add >> New Item >> Field Control >> Name : SocialSecurityNumber

Step4: VS3WSS 1.2 extensions will create three items:
a) Two C# files that will contain field controls
b) An XML file for custom field type.

We have to copy over these files to our WSPBuilder project.
Step5: We are back to our main WSPBuilder project (OfficeSpaceFieldTypes). Under TEMPLATE folder, we create a new folder named "XML". We copy the XML file from VSeWSS 1.2 project and rename to "fldtypes_OfficeSpace.xml" as shown the screen shot below. We also add a new folder named "FieldControlSocialSecurityNumber" and copy the two C# files which we were generated in VSeWSS project.

Step6: In the "CustomFieldUsingVSeWSS" project, the namespace is CustomFieldUsingVSeWSS. We need to change the namespace to our own which is "OfficeSpaceFieldTypes"


Step7: We now focus on XML part and specifically on the FieldTypeClass. We have to assign 5 part assembly name.
First: The class name i.e. OfficeSpaceFieldTypes.SocialSecurityNumberField (Namespace and the class SocialSecurityNumber.Field.cs )
4 part assembly name: OfficeSpaceFieldTypes, Version=1.0.0.0, Culture=neutral, PublicKeyToken=79bb268b486ef344.
How to get the public key token? follow my earlier post.

Step8: Data validation
We need some kind of logic for social security number. The format of SSN is 123-45-1234. We do this logic under SocialSecurityNumber.FieldControl.cs file.
public override string GetValidatedString(object value)
{
string UserInput = value.ToString();
string SSN_RegularExpression = @"^\d{3}-\d{2}-\d{4}$";
if ((this.Required || !string.IsNullOrEmpty(UserInput)) &
(!Regex.IsMatch(UserInput, SSN_RegularExpression)))
{
throw new SPFieldValidationException("SSN must be form of 123-45-6789");
}
return base.GetValidatedString(value);
}
{
string UserInput = value.ToString();
string SSN_RegularExpression = @"^\d{3}-\d{2}-\d{4}$";
if ((this.Required || !string.IsNullOrEmpty(UserInput)) &
(!Regex.IsMatch(UserInput, SSN_RegularExpression)))
{
throw new SPFieldValidationException("SSN must be form of 123-45-6789");
}
return base.GetValidatedString(value);
}

Step9: To ASP.NET templates.
Under "TEMPLATE" folder, we create one more folder named "CONTROLTEMPLATES". It will host our all user controls. But before we proceed further, we have to add ASP.NET templates. Follow my earlier post and follow same steps.
Once ASP.NET templates are added in our project, we can add new web controls. Right click on "CONTROLTEMPLATES">> Add >> New Item >> Choose "Web User Control" and name it "OfficeSpace.SocialSecurityNumber". Delete the both the C# files as shown below.

Go to OfficeSpace.SocialSecurityNumber.ascx file and write following code:

VSeWSS give us a template and we can extend using our own custom logic. By default, VSeWSS extensions give this method:
public class SocialSecurityNumberFieldControl : TextField
{
}
{
}
We override using "BaseFieldControl"
public class SocialSecurityNumberFieldControl : BaseFieldControl
{
{
protected TextBox txtUserInput;
protected override string DefaultTemplateName
{
get
{
return "SocialSecurityNumberRenderingTemplate";
}
}
protected override void CreateChildControls()
{
base.CreateChildControls();
txtUserInput = (TextBox)this.TemplateContainer.FindControl("txtUserInput");
}
public override object Value
{
get
{
this.EnsureChildControls();
return txtUserInput.Text;
}
set
{
this.EnsureChildControls();
txtUserInput.Text = (string)this.ItemFieldValue;
}
}
}
Depoy the code >> Activate the feature >> Add new column in Task List.

Add a new entry and test the SSN field.

----------------------------------------------------------------------------------------------------------------------
Step1: United States Address (Multicolumn values)
We switch the CustomFieldUsingVSeWSS project >> Right click on the project >> Add >> New Item >> Field Control >> Name : UnitedStatesAddres.
Two C# files that will be generated that contains field controls.
i) UnitedStatesAddress.Field.cs
ii) UnitedStatesAddress.FieldControl.cs

Step2: Switch back to the OfficeSpaceFieldTypes project, right click on the project >> Create a new folder named "FieldControlUnitedStatesAddress". Copy the both the C# files (UnitedStatesAddress.Field.cs and UnitedStatesAddress.FieldControl.cs) into OfficeSpaceFieldsControls

Step3: In the "CustomFieldUsingVSeWSS" project, the namespace is CustomFieldUsingVSeWSS. We need to change the namespace to our own which is "OfficeSpaceFieldTypes"


Step4: Right click on "CONTROLTEMPLATES">> Add >> New Item >> Choose "Web User Control" and name it "OfficeSpace.UnitedStatesAddress". Delete the both the C# files as shown below.

Go to OfficeSpace.UnitedStatesAddress.ascx file and write following code:

Step5: In the UnitedStatesAddress.FieldControl.cs code, we write in this code:
public class UnitedStatesAddressFieldControl : BaseFieldControl
{
protected override string DefaultTemplateName
{
get
{
return "UnitedStatesAddressRenderingTemplate";
}
}
protected TextBox txtStreet;
protected TextBox txtCity;
protected TextBox txtState;
protected TextBox txtZipcode;
protected override void CreateChildControls()
{
base.CreateChildControls();
txtStreet = (TextBox)this.TemplateContainer.FindControl("txtStreet");
txtCity = (TextBox)this.TemplateContainer.FindControl("txtCity");
txtState = (TextBox)this.TemplateContainer.FindControl("txtState");
txtZipcode = (TextBox)this.TemplateContainer.FindControl("txtZipcode");
}
public override object Value
{
get
{
this.EnsureChildControls();
SPFieldMultiColumnValue mcv = new SPFieldMultiColumnValue(4);
mcv[0] = txtStreet.Text;
mcv[1] = txtCity.Text;
mcv[2] = txtState.Text;
mcv[3] = txtZipcode.Text;
return mcv;
}
set
{
this.EnsureChildControls();
SPFieldMultiColumnValue mcv = (SPFieldMultiColumnValue)this.ItemFieldValue;
txtStreet.Text = mcv[0];
txtCity.Text = mcv[1];
txtState.Text = mcv[2]; ;
txtZipcode.Text = mcv[3];
}
}
}
{
protected override string DefaultTemplateName
{
get
{
return "UnitedStatesAddressRenderingTemplate";
}
}
protected TextBox txtStreet;
protected TextBox txtCity;
protected TextBox txtState;
protected TextBox txtZipcode;
protected override void CreateChildControls()
{
base.CreateChildControls();
txtStreet = (TextBox)this.TemplateContainer.FindControl("txtStreet");
txtCity = (TextBox)this.TemplateContainer.FindControl("txtCity");
txtState = (TextBox)this.TemplateContainer.FindControl("txtState");
txtZipcode = (TextBox)this.TemplateContainer.FindControl("txtZipcode");
}
public override object Value
{
get
{
this.EnsureChildControls();
SPFieldMultiColumnValue mcv = new SPFieldMultiColumnValue(4);
mcv[0] = txtStreet.Text;
mcv[1] = txtCity.Text;
mcv[2] = txtState.Text;
mcv[3] = txtZipcode.Text;
return mcv;
}
set
{
this.EnsureChildControls();
SPFieldMultiColumnValue mcv = (SPFieldMultiColumnValue)this.ItemFieldValue;
txtStreet.Text = mcv[0];
txtCity.Text = mcv[1];
txtState.Text = mcv[2]; ;
txtZipcode.Text = mcv[3];
}
}
}
Step6: Open fldtypes_OfficeSpace.xml and add the following code:

Step7: Deploy the project. >> Add new column in Task List. >>

Add a new entry in the task list:

--------------------------------------------------------------------------------------------------------------------
Step1: Employee Status (Custom Property Fields)
We switch the CustomFieldUsingVSeWSS project >> Right click on the project >> Add >> New Item >> Field Control >> Name : EmployeeStatus.
Two C# files that will be generated that contains field controls.
i) EmployeeStatus.Field.cs
ii) EmployeeStatus.FieldControl.cs

Step2: Switch back to the OfficeSpaceFieldTypes project, right click on the project >> Create a new folder named "FieldControlEmployeeStatus". Copy the both the C# files (EmployeeStatus.Field.cs and EmployeeStatus.FieldControl.cs) into OfficeSpaceFieldsControls

Step3: In the "CustomFieldUsingVSeWSS" project, the namespace is CustomFieldUsingVSeWSS. We need to change the namespace to our own which is "OfficeSpaceFieldTypes"


Step4: Right click on "CONTROLTEMPLATES">> Add >> New Item >> Choose "Web User Control" and name it "OfficeSpace.EmployeeStatus.". Delete the both the C# files as shown below.

Go to OfficeSpace.EmployeeStatus.ascx file and write following code:
Step5: In the EmployeeStatus.FieldControl.cs code, we write in this code:

Step5: In the EmployeeStatus.FieldControl.cs code, we write in this code:
public class EmployeeStatusFieldControl : BaseFieldControl
{
protected RadioButtonList lstEmployeeStatus;
protected override string DefaultTemplateName
{
get
{
return "EmployeeStatusRenderingTemplate";
}
}
protected override void CreateChildControls()
{
base.CreateChildControls();
lstEmployeeStatus = (RadioButtonList)TemplateContainer.FindControl("lstEmployeeStatus");
if (lstEmployeeStatus != null)
{
lstEmployeeStatus.Items.Clear();
lstEmployeeStatus.Items.Add("Full-time Employee");
lstEmployeeStatus.Items.Add("Part-time Employee");
// check to see if contractors are allowed
bool AllowContactors = (bool)this.Field.GetCustomProperty("AllowContractors");
if (AllowContactors)
{
lstEmployeeStatus.Items.Add("Contractor");
}
// check to see if interns are allowed
bool AllowInterns = (bool)this.Field.GetCustomProperty("AllowInterns");
if (AllowInterns)
{
lstEmployeeStatus.Items.Add("Intern");
}
}
}
public override object Value
{
get
{
this.EnsureChildControls();
return lstEmployeeStatus.SelectedValue;
}
set
{
this.EnsureChildControls();
lstEmployeeStatus.Items.FindByValue(ItemFieldValue.ToString()).Selected = true;
}
}
}
{
protected RadioButtonList lstEmployeeStatus;
protected override string DefaultTemplateName
{
get
{
return "EmployeeStatusRenderingTemplate";
}
}
protected override void CreateChildControls()
{
base.CreateChildControls();
lstEmployeeStatus = (RadioButtonList)TemplateContainer.FindControl("lstEmployeeStatus");
if (lstEmployeeStatus != null)
{
lstEmployeeStatus.Items.Clear();
lstEmployeeStatus.Items.Add("Full-time Employee");
lstEmployeeStatus.Items.Add("Part-time Employee");
// check to see if contractors are allowed
bool AllowContactors = (bool)this.Field.GetCustomProperty("AllowContractors");
if (AllowContactors)
{
lstEmployeeStatus.Items.Add("Contractor");
}
// check to see if interns are allowed
bool AllowInterns = (bool)this.Field.GetCustomProperty("AllowInterns");
if (AllowInterns)
{
lstEmployeeStatus.Items.Add("Intern");
}
}
}
public override object Value
{
get
{
this.EnsureChildControls();
return lstEmployeeStatus.SelectedValue;
}
set
{
this.EnsureChildControls();
lstEmployeeStatus.Items.FindByValue(ItemFieldValue.ToString()).Selected = true;
}
}
}
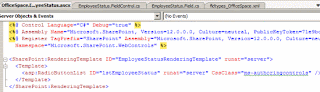
Step6: Open fldtypes_OfficeSpace.xml and add the following code:

Step7: Deploy the project. >> Add new column in Task List. >>


Step8: Create a new entry in the task list and we can choose one type of employee.

Cheers,
--aaroh
Download the source here.
References:


1 comment:
Hi Aroh. It was really a nice post.
I downloading the source code you uploaded and i tried deploying only the Address custom field type of your s manually. ( Not through WSP Builder )
But when i tried creating a column , i receive the below error :
The given key was not present in the dictionary. at System.ThrowHelper.ThrowKeyNotFoundException()
at System.Collections.Generic.Dictionary`2.get_Item(TKey key)
at Microsoft.SharePoint.SPFieldCollection.CreateSPField(Int32 index)
at Microsoft.SharePoint.SPFieldCollection.EnsureSPField(Int32 index)
at Microsoft.SharePoint.SPFieldCollection.get_Item(Int32 iIndex)
at Microsoft.SharePoint.ApplicationPages.FieldCustomizationPage.OnPreRender(EventArgs e)
at Microsoft.SharePoint.ApplicationPages.FieldNewPage.OnPreRender(EventArgs e)
at System.Web.UI.Control.PreRenderRecursiveInternal()
at System.Web.UI.Page.ProcessRequestMain(Boolean includeStagesBeforeAsyncPoint, Boolean includeStagesAfterAsyncPoint)
Can you please guide me on this.
Post a Comment